Introducing: The Basic Throw
Let’s break it down
Sue Pierce
| 4 min read

It is no easy feat, teaching kids to throw. The movement itself is not exactly intuitive.
Arms go up, point with the glove, step with the left – but which leg again? Breaking the basic throw into parts helps the youngest kiddos learn correctly from the start.
Grip
Coaches might introduce the four-seam grip one time during the tee ball season. But no need to spend too much time on this. “Show them and tell them that’s how the ball flies the straightest and fastest,” says Dan Keller, a longtime baseball coach and founder of Dugout Captain. It’s fine if it never comes up again. The seed has been planted.
Feet first
Focus on the ankle eye. The what now?
Think: foot positioning. Teaching kids about the ankle eye – the ankle bump on the inside of the back foot – is one way to help them get their feet in the right place.
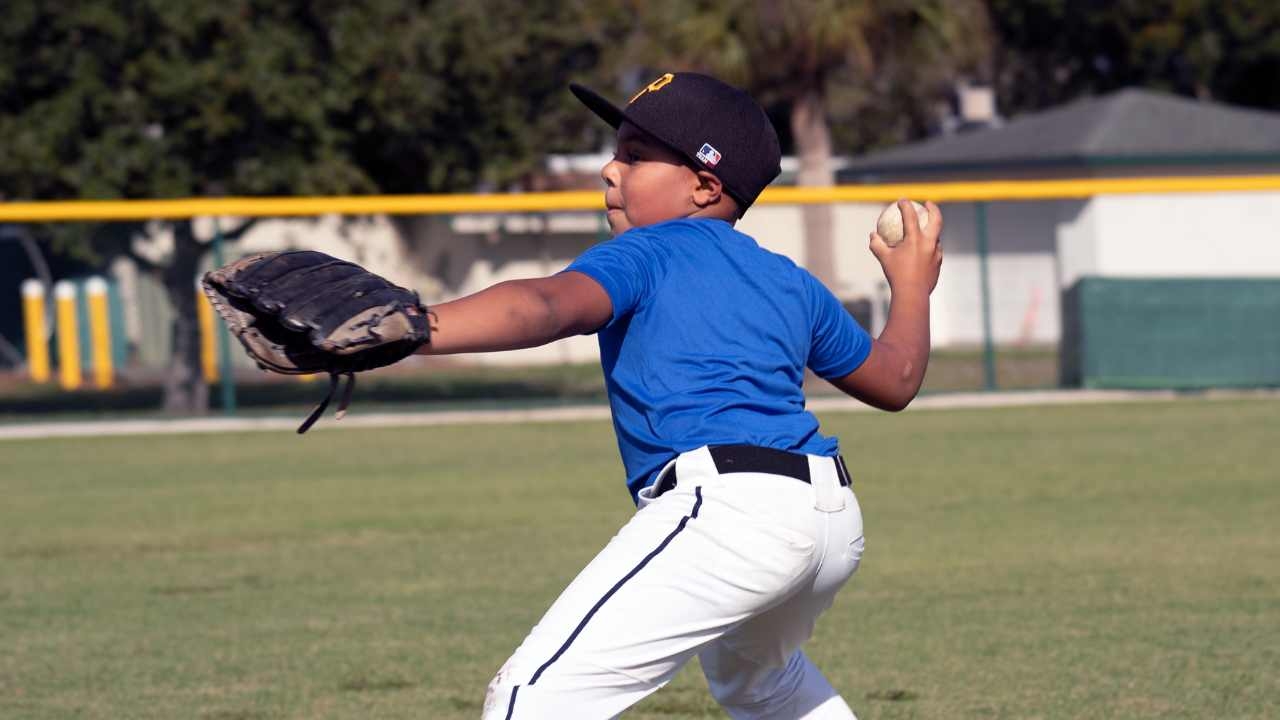
After a right-handed player fields or catches the ball, their first step is with their right foot. The inside of that foot — a.k.a. the ankle eye — should face their target. Then, the left foot steps, and their shoulders automatically line up to target. “Pair that with a point-and-go of the glove arm and we’ve created an optimal throwing position,” says Keller. The opposite rhythm holds true for left-handed athletes.
On point
Have young kids point their glove where they want to throw the ball. It’s an easy cue that helps line up kids’ shoulders and improves their odds of hitting their target. It helps kids focus and teaches them that accuracy matters, says Keller.
Hold that thought
It’s close to impossible to teach a dozen 7-year-olds anything at the same time. Having them hold positions can help.
As kids move through a throw, have them freeze at key moments, on your call.
Call out “1,2,3 — reach.” Players point their gloves, raise their throwing arms and pause. While they’re frozen, ask them to check their bodies and make necessary adjustments.
Next, call “1,2,3 — throw.” Kids should hold their throwing arm at the end of their follow-through to make sure their hands are in the right place. Have right-handed throwers “tap, tap, tap” their left thigh to ensure their right arm is across their body. Reverse this for lefties.
“We let these anchor points guide the throwing motion,” says Keller. “Teaching positions now can help to coach movements down the road.”
Play it safe
When kids are just learning to throw, sometimes it’s safer not to play catch. Line your players up along the foul line, with their back foot right next to the chalk. On your call, players throw the ball into centerfield. Move from light to heavy, starting with three wiffle balls, then three tennis balls, and then three baseballs.
Focus the first session on stepping and striding with the legs. Next time you practice, move to the arms — coaching them to point with the glove, then move the throwing hand high and away from the body. Add a little fun competition by seeing who can throw the farthest or hit a target. Even better, see who can hit a coach standing in the field.
Dan Keller is part of MOJO’s Partnerships & Strategy team.


